
Have you wanted to try a PDF Sewing Pattern but been completely unsure where to start? After all, here at Lilac Lane Patterns, we specialize in girl’s clothing. But wait! Your printer isn’t big enough to print a pattern that big, right? It’s much easier than you think! Keep reading . . .
First of all, what is a PDF? This is a type of file that stands for Portable Document File. This file type is ideal for patterns because it allows the file to be fixed, meaning all text, graphics, and drawings will print at the size created by the document writer. Furthermore, despite there being many programs that will open a PDF, they will open THE SAME in each program. The good news for you is that you don’t need to worry that your computer or other device CHANGED the file! The better news is that programs which open these files are FREE. The program I use and the one I recommend is Adobe Reader.
The beauty of a PDF sewing pattern is that you can print as little or as much as you want. Prefer to use your laptop or I-pad to read the instructions? By all means, save a tree and don’t print those pages! If the pattern uses simple, rectangular pieces, it’s possible that the dimensions of the piece will be given rather than a pattern piece that needs to be printed. If the whole pattern piece fits on one page, a one inch box will be included to measure. Below is a pattern piece just like that. You need to print the page. IMPORTANT: when you print the page make sure you click “Do Not Scale” or “100%” or “Actual Size.” Then measure the 1″ box and make sure it truly is 1″. If it is not, your pattern will print in the wrong size. And a little difference in one inch adds up to a big difference overall.
Now I know what you’re thinking. This is all well and good for a one page pattern piece, but I want to make a girl’s outfit! There is no way that will print on one page. Never fear! We have that covered as well.
First, print the pattern pages you need with the directions I gave you above. Remember to click “do not scale.” I also like to make sure “auto portrait/landscape” is checked. It will look like this:
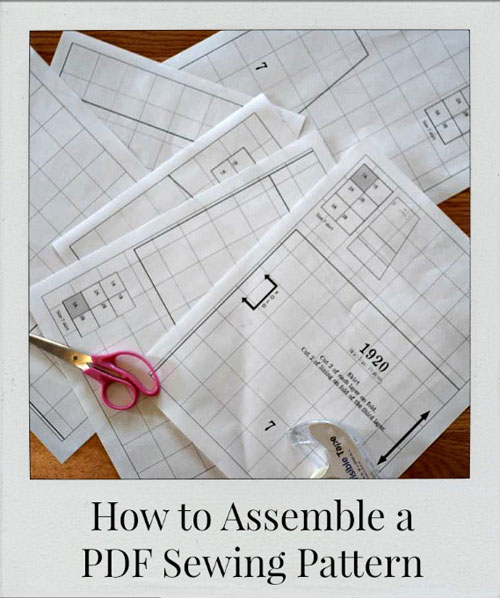
Now you have several pages. What do you do? Well gather up some tape and a pair of paper scissors. And make sure you’re working on a flat surface. The floor will do!
You’re ready to start assembling. At Lilac Lane, we have an illustration of the assembled pattern piece on the first page of each pattern piece. This will let you know where you’re headed with the pattern. We also have a graphic telling you which page you’re on. And each page is marked with the size you are making as well as what the pattern piece is. You can tell this page fits in the top left corner because it is marked 1A. (If you have a color printer this will even print in color.) You can also tell we are working with size 7 and there’s also an illustration of the finished skirt. Now the background of these pages are filled with a 1″ grid, so ALL the boxes should measure 1″.
So it’s time to start assembling. First lay the pattern out and make sure you have all the pieces.
It looks like we’re good to go. Now take the scissors and consistently cut each piece. By this, I mean decide if you want to take the lower or upper border off of each piece. Then decide if you want to take the left or the right border off of each piece. I decided to remove the lower border and the left border. You can see this below:
Tape these pieces together so that everything lines up exactly and the 1″ squares are maintained.
Continue doing this until the whole pattern is taped together.
And now cut out the pattern piece!
That’s it! You’re ready to sew. This takes just a bit of time, but you can print the pattern over and over again in whichever sizes you want. Let us know if this is helpful to you! And good luck with your first PDF Sewing Pattern.